Introduction
A chrome extension is a program that is installed in the Chrome browser that enhances the functionality of the browser. You can build one easily using web technologies like HTML, CSS, and JavaScript.
Creating a chrome extension is similar to creating a web application, but it requires a manifest.json file which we will discuss in the last section of this post.
What Will our Chrome Extension Look Like?
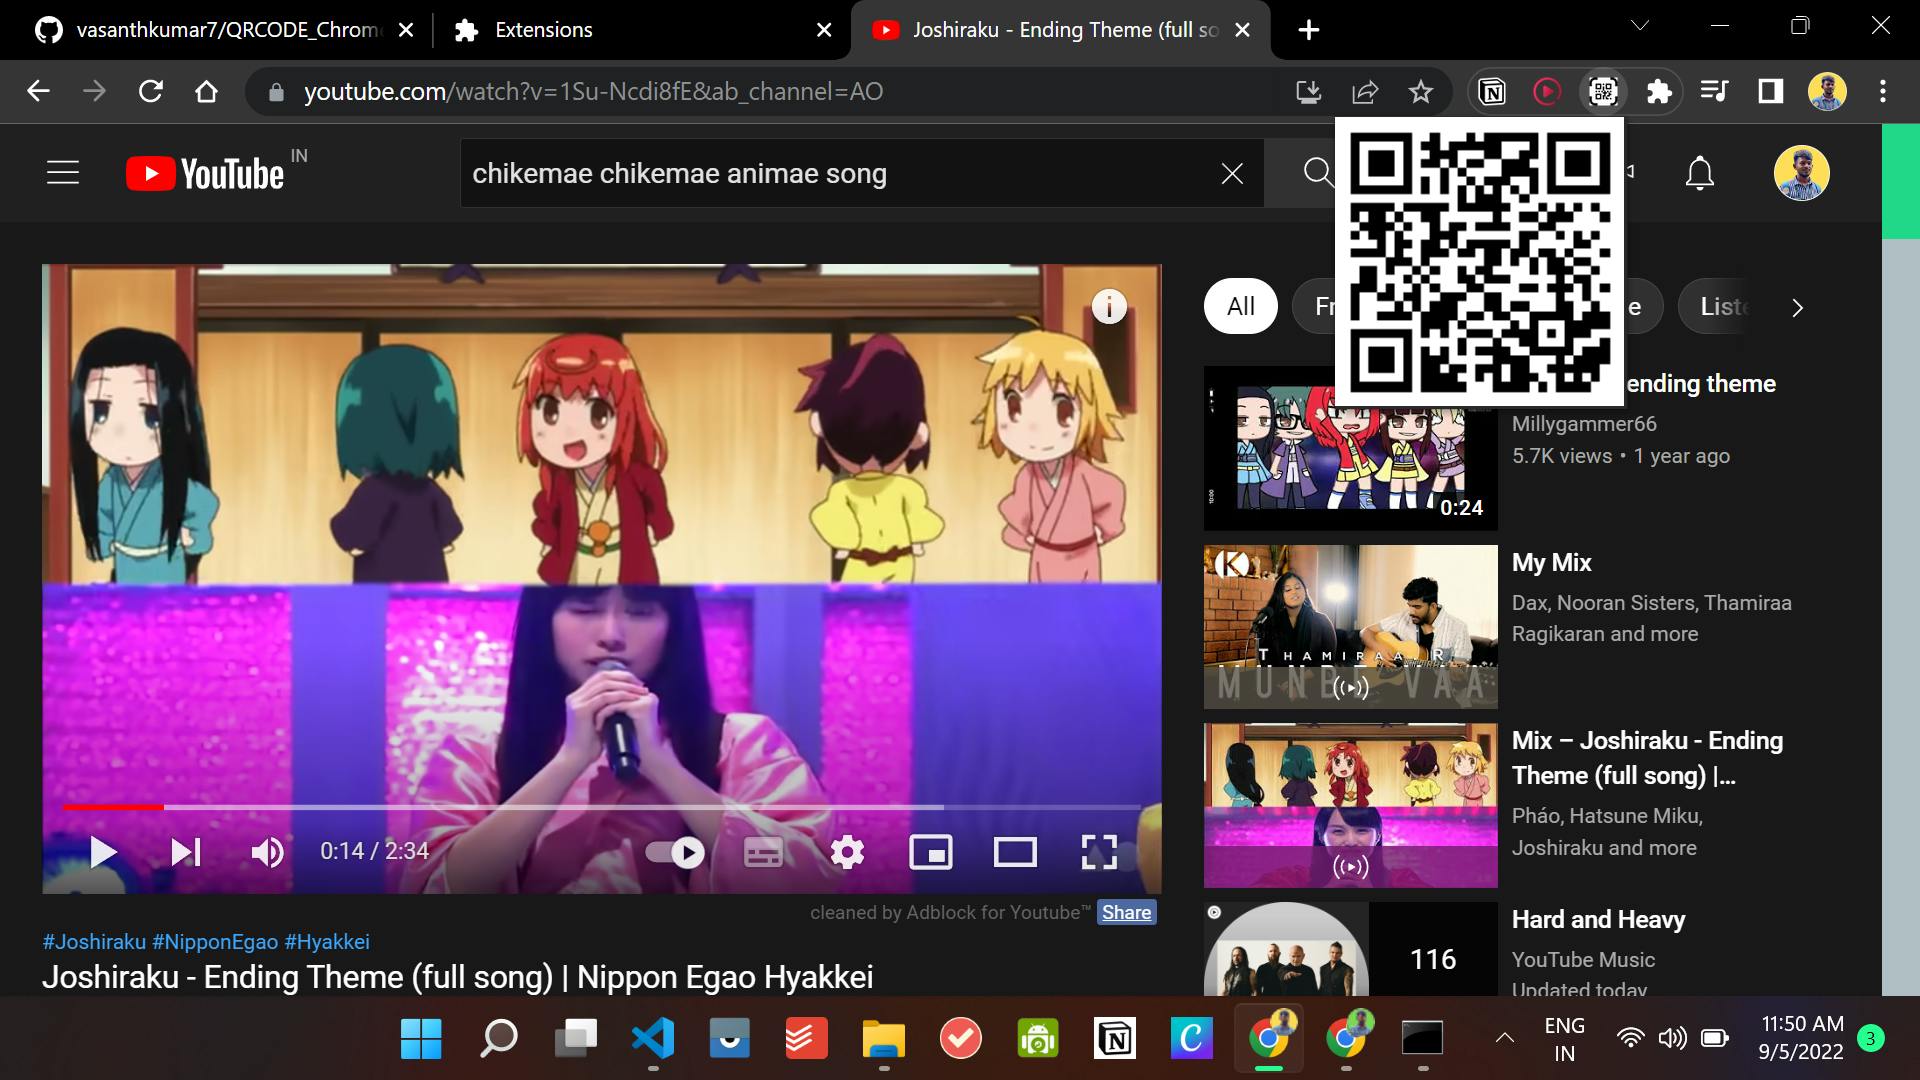 As you can see, the above chrome extension will create QR code for website where you clicked the extension. We will be looking into how to create this extension in this blog post.
Here, we will be using the https://api.qrserver.com/v1/create-qr-code/?size=150x150&data= API in the order to create QR code.
The complete source code of this project can be found on GitHub.
How to Create a Chrome Extension
First of all, we need to create an empty folder where we will add our HTML, CSS, and JavaScript files.
Inside the folder, let’s create an index.html file with this HTML boilerplate code:
<html lang="en">
<head>


</head>
<body>
    <img src="example" id="qrcode">
  <script src="Content.js"></script>
</body>
</html>
In the above code it will display QR code of 150px X 150px. In the image tag QR code will be displayed.
Now, since the table has been displayed, we need to work on writing JavaScript in order to fetch data from the API.
Let's create a script.js file and add the following code:
chrome.tabs.getSelected(null, function(tab) {
    document.getElementById("qrcode").src = "https://api.qrserver.com/v1/create-qr-code/?size=150x150&data="+tab.url;
});
Now, let’s break down the above code:
- Here we are using the API to create a QR code
- Then it will display it in the Image tag which as 'qrcode' as ID
If we check the browser, we will be able to see the following result.
Manifest.json File
As we discussed earlier, building a Chrome extension is similar to building any web application. The only difference is that the Chrome extension requires a manifest.json file where we keep all the configurations.
The manifest.json file contains all the necessary information required to build the Chrome extension. It is the first file the extension checks and everything is loaded from this single file.
Now, let's create a manifest.json file in the root folder and add the following code:
{
    "name": "VK QR",
    "version": "1.0",
    "description": "demo",
    "manifest_version":2,
    "browser_action":{
        "default_popup":"demo.html",
        "default_icon":"logo.png"
    },
    "background": {
        "service_worker": "Content.js"
      },
    "action":{}
    ,
    "permissions": [
        "tabs",
        "activeTab",
        "scripting",
        "<all_urls>"
    ]
}
Our manifest.json file contains the value of name, version, description, manifest_version (2 in this case, which is the latest manifest version), author, and action fields. In the action field, there's the value for default_popup which contains the path to the HTML file which is index.html in this example.
You can have a look here to see all configurations of a manifest.json file.
Now, since we've also added the manifest.json file we are ready to add this project as an extension in our Chrome browser.
For that, we need to go to Select More Tools and then choose Extensions from the browser menu as shown in the picture below:
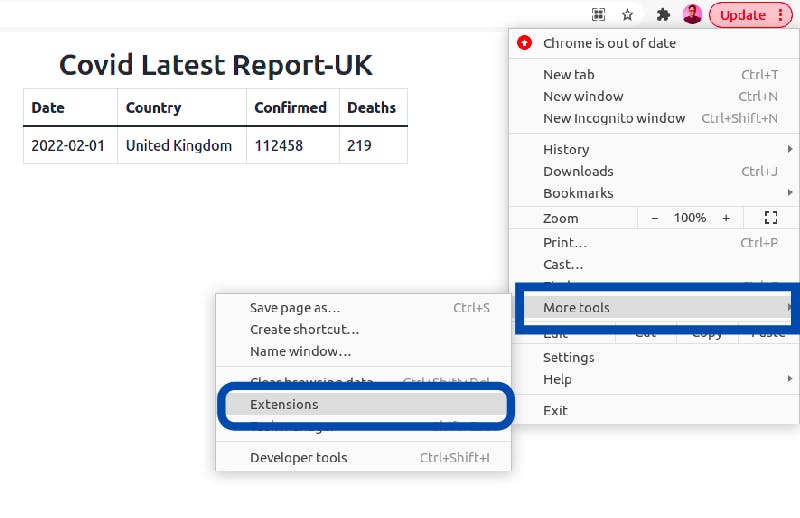 After choosing Extensions, it redirects to the extensions page in Chrome. Make sure to enable the Developer mode here.
 Once that's done, you need to click the Load unpacked button which will allow us to load our project in the Chrome extension store.
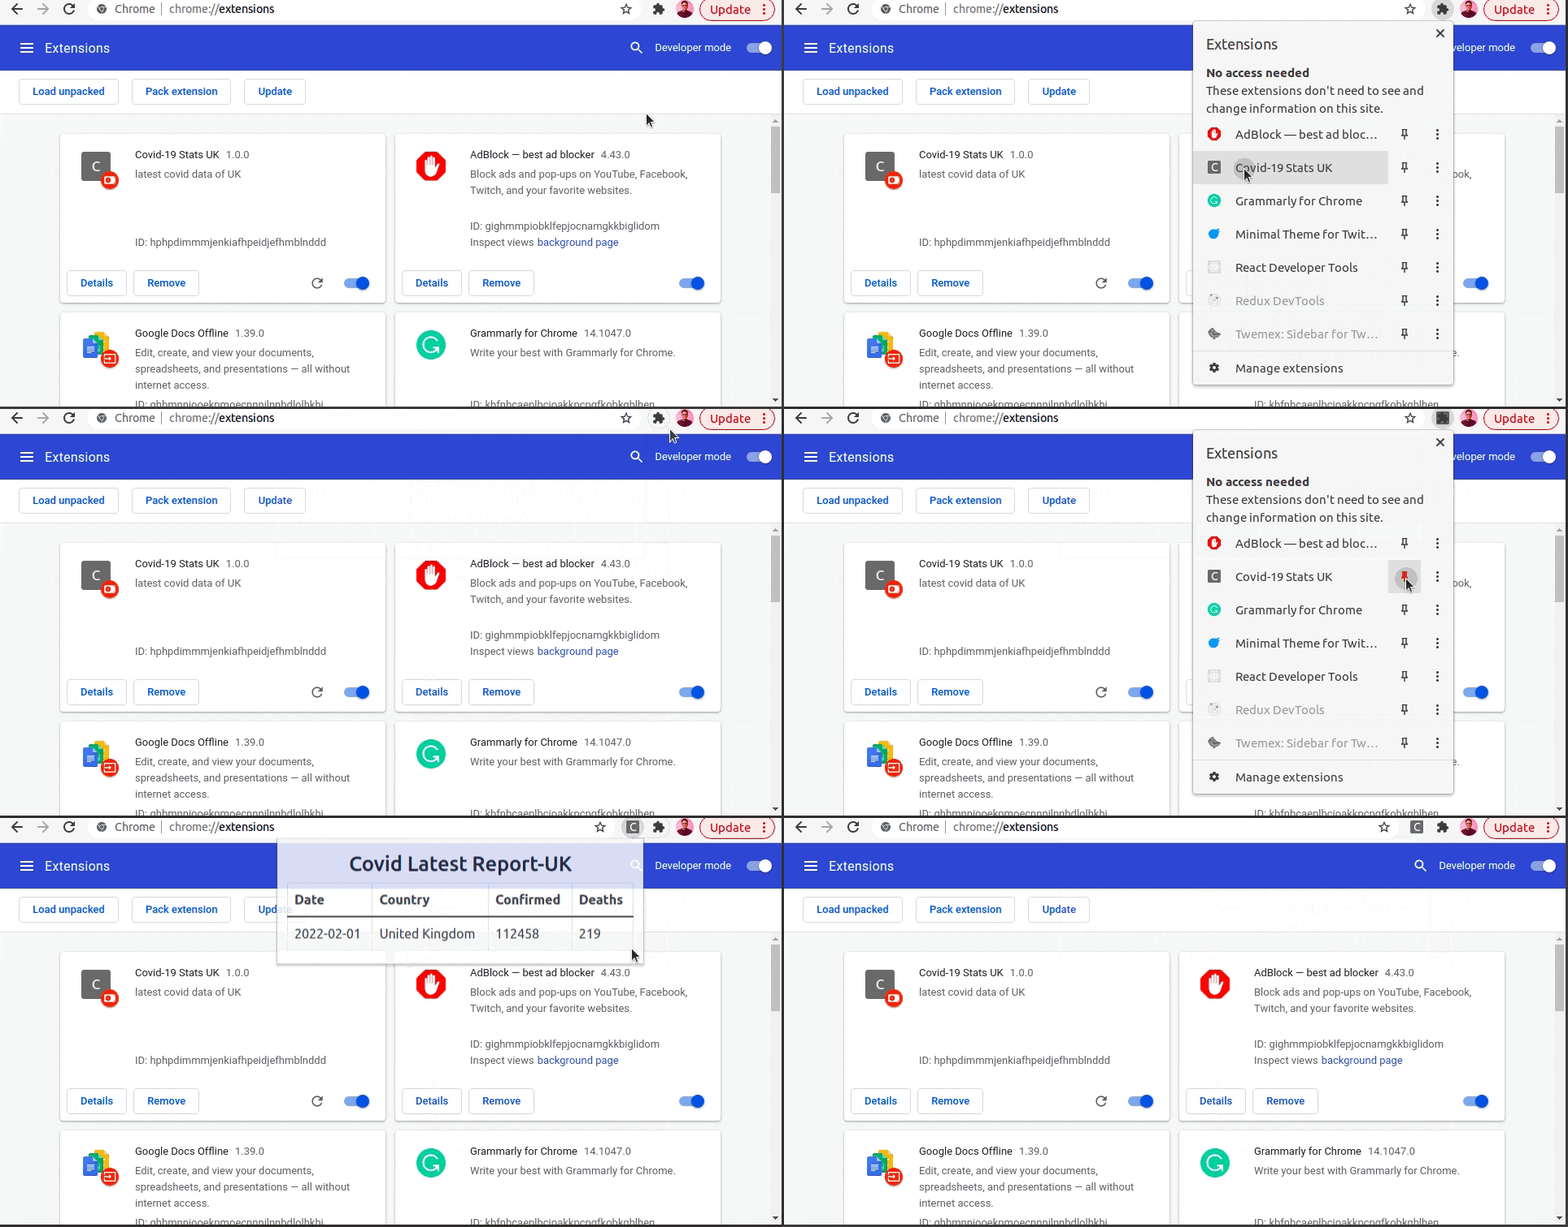
Now, the extension is available in our Chrome extension store. You can also pin the extension in the browser as shown in the gif below:
Conclusion
If you have some HTML, CSS, and JavaScript knowledge, you can easily build Chrome extensions. I hope after reading this blog post, you will create some cool extensions.

